This is the first in a two part article that looks at using Eclipse as a development environment for developing web applications that use the BusinessObjects XI3 Java SDK.
Eclipse is one of the leading development environments for Java applications and indeed other technologies such as C++ and is packed with features that greatly improve productivity and team working. What’s more as it is open source it is free!
The first article in this series looks at how to install and configure Eclipse for web development and the second article then looks at how to reference the BusinessObjects Java SDK in order to develop a BusinessObjects web application.
Contents
Part One
-
- Prerequisite Software
- Resources
- Install Eclipse
- Install the Eclipse Plugins for Web Application Development
- Configuring Eclipse for Web Development
- Configuring the Workspace for Web Development
- Create a New Web Development Project
- Create a Basic JSP
- Web Archive – How to create a war file from Eclipse
Part Two
Prerequisite Software
Eclipse is available in various packages depending on your development requirements. We can either use the Eclipse for Enterprise Java which includes the web development tools or we use the basic Eclipse for Java and then add on the web development tools. See the Compare Packages page for a summary of the differences between the versions.
Eclipse for Enterprise Java when installed is already setup for web development however it contains more features than we need to BOE web development. The instructions below use the basic Eclipse for Java and then step through adding on the required web development tools. If you are using Eclipse for Enterprise Java then you can skip down to the section “Configuring the Workspace for Web Development”.
All Eclipse products can all be downloaded from links on the download page.
Either download the Eclipse IDE for Java EE Developers or download the basic Eclipse IDE Eclipse Galileo (Eclipse classic 3.5.1) and then download the Web Tools Platform project and it’s prerequisites: EMF v2.5 Runtime, EMF XSD v2.5 Runtime and Graphical Editing Framework (GEF).
In addition to Eclipse you will also need a Java Development Kit – JDK 1.5 or above – which you can download from Sun and Apache Tomcat 5.5 or above which you can download from the Apache web site.
Resources
For further information on Eclipse refer to their online documentation especially the getting started section.
If you want to learn Java Web Technology then there is detailed online course at gulland.com.
For reference materials on BusinessObjects SDK go to the SAP Support.
You may also wish to check out an online tutorial on using the Eclipse Web Tools Platform with Apache Tomcat.
Install Eclipse
Eclipse is downloaded as a ZIP package. It doesn’t require installation and so you just unzip the package to a suitable folder – I use C:Eclipse but you could also use C:Program FilesEclipse
Once unzipped you can launch Eclipse by running the file eclipse.exe. You probably want to create a shortcut to this executable on your desktop or in your start menu.
When you first launch eclipse it will as you to create a workspace. You can either accept the default however I prefer to create mine in a more accessible location. This workspace folder will contain all your work – the source code and the build packages.
For the remaining steps described below I’ll be using the following as the Eclipse installation folder,
C:Eclipseeclipse-java-galileo-win32
Install the Eclipse Plugins for Web Application Development
Now that we’ve installed eclipse we need to install the web development plugins from the Web Tools Package.
-
- Shutdown Eclipse if it is currently running
- Copy the ZIP files that you have downloaded to the Eclipse ‘dropins’ folder which is found at,
C:Eclipseeclipse-java-galileo-win32eclipsedropins
-
- Unzip each file to the current folder so that you have the following subfolders of the dropins folder,
emf-runtime-2.5.0
GEF-SDK-3.5.1
wtp-R-3.1.1-20090917225226
xsd-runtime-2.5.0
-
- Now start up Eclipse and the plugins will be installed automatically.
- To check that they have been successfully installed select ‘About Eclipse’ from the Help menu and in the dialog you’ll see 5 icons.
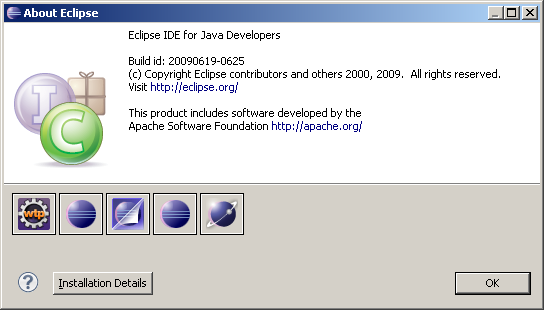
These icons represent the different features installed in Eclipse and the ‘wtp’ icon is for the Web Tools Project. Clicking this will display details of the version and features available in the Web Tools Project.
- When you first launch Eclipse for the first time your view is of the welcome screen, select the icon to go to the workbench and we are now ready to configure eclipse for web development.
Configuring Eclipse for Web Development
If you already have a project under development in eclipse then we need to create a new workspace that we can configure for web development. If however you have just installed Eclipse then you already have a new workspace and so we can go ahead and configure that one.
Create a New Workspace
If you need to create a new workspace then follow these steps otherwise skip to the next section.
- From the File menu select New Workspace
- Create a workspace folder in your preferred location
We can now configure this workspace for web development. Note, when you next launch eclipse you’ll be asked to select a workspace and so select this one. You may wish then to give it a name that refers to the project.
Configuring the Workspace for Web Development
The first thing we do is to define Tomcat as the web application server,
-
- Change the perspective to web development if not already (Eclipse for Enterprise Java may default to this): Window > Open Perspective > Other and then select Java EE from the list.
- Next select Windows > Preferences and then in the list of items on the right select expand Server and select Runtime Environments.
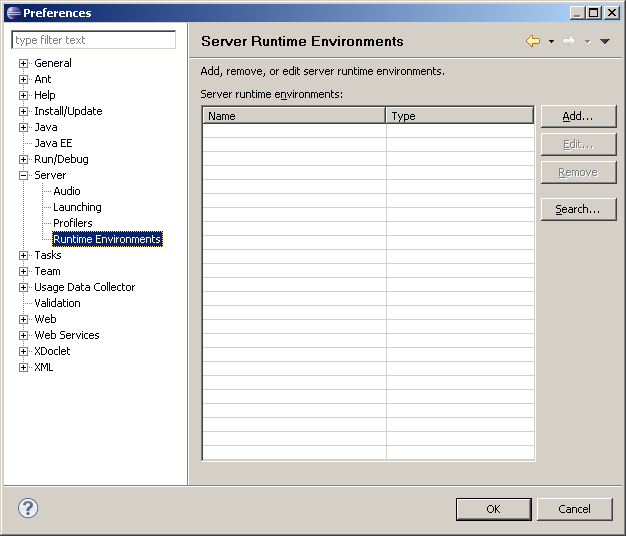
-
- In the panel on the right click Add to add a new Tomcat server.
- Select Apache Tomcat v5.5 and click Next
- Enter path to Tomcat installation. Select the folder that contains the sub folders ‘bin’, ‘conf’ etc, for example C:Tomcatapache-tomcat-5.5.26
- In the same dialog we need to specify the JDK that Tomcat will use to compile JSPs etc. To do this click on Installed JREs
- In the next dialog click Add
- Select Standard VM for JRE Type and click Next
- Click Directory and select the JDK folder: C:Program FilesJavajdk1.5.0_11. Eclipse will now add the libraries for the JVM
- Click Finish to return to the JRE dialog
- Here select the checkbox next to the JDK you’ve just added. It should look something like the following
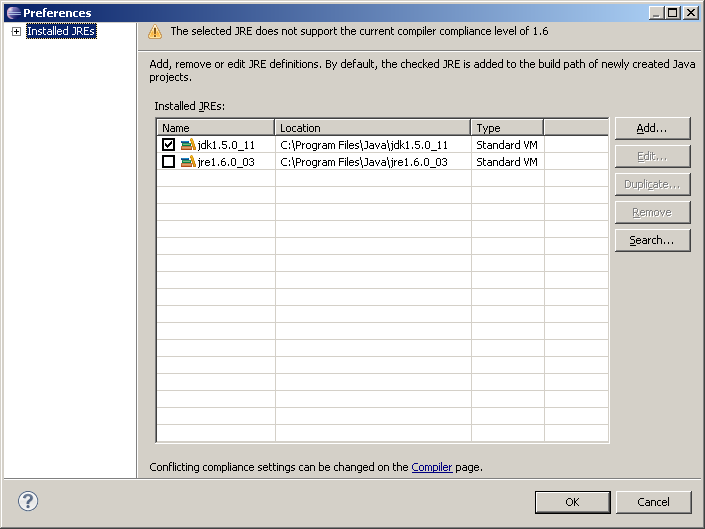
- Click OK to close that dialog
- Click Finish to adding new Tomcat server
- And finally OK to return to the Eclipse workbench.
Eclipse is now configured to use Tomcat as a web application server. When testing your web app you may wish to manually start and stop Tomcat yourself. To do this we need to open the server view, - From the Window menu select Show View > Servers. The Servers dialog will open in the workbench, you can move it around, I prefer to have mine in the same panel as the project explorer.
Create a New Web Development Project
OK now we’ve setup Eclipse we can start a new project
-
- Create a new Dynamic Web Project by right-clicking in the empty white space of the Package Explorer pane at the extreme left of the workbench, choosing New > Dynamic Web Project.
- Give it a name such as ‘boe’
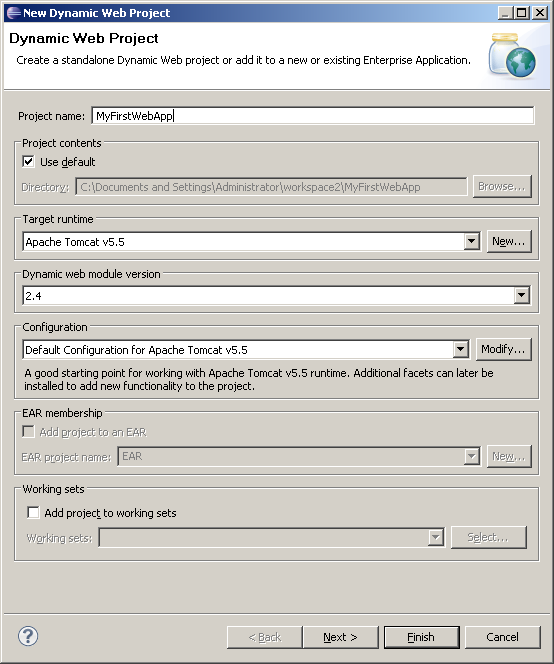
- No further settings is required so just click finish.
Create a Basic JSP
OK we can now create a simple JSP and then check that everything is working as expected.
-
- Right click over the white space area in the project explorer and select New > JSP (you can also right click over any of the folders – Eclipse will always know to put new JSPs in the correct Web Content folder).
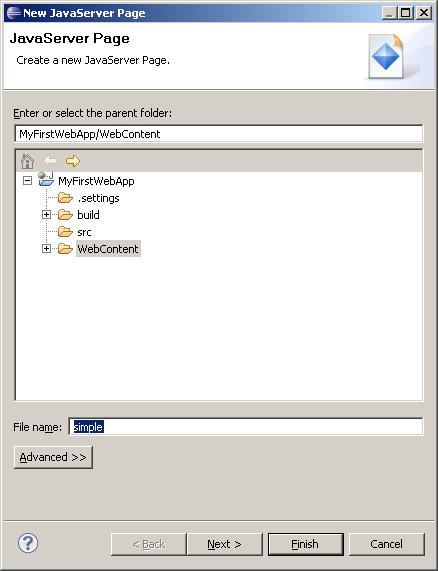
-
- Enter a name for the JSP ‘simple’ and click Next. Note, when requesting a JSP page via a URL the name is case sensitive so it is a good idea not to mix case in JSP file names if possible.
- Select any template – default is fine for our needs. Note, you can create your own JSP templates in Eclipse that can contain a default page layout or reference corporate CSS files.
- You should now have a screen similar to the one below and we can now write some JSP code.
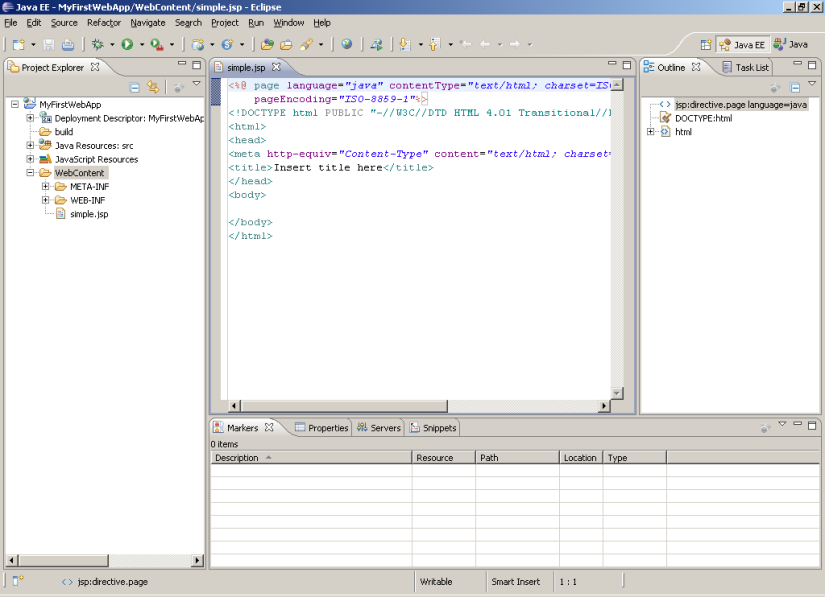
-
- Enter the following code between the ‘body’ tags,
This page was last viewed <%= session.getLastAccessedTime() %>
-
- Save the JSP file by clicking the save icon or CTRL+s or from File > Save menu
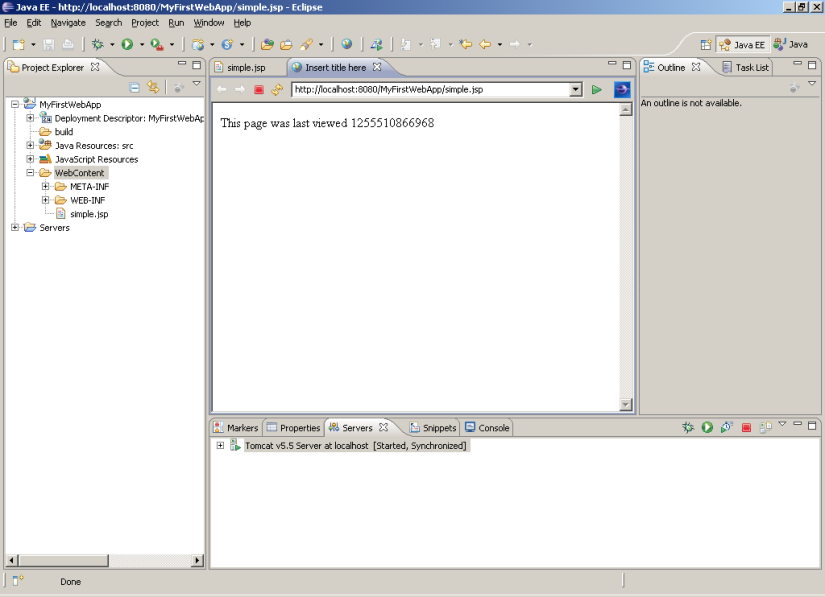
Now we want to test the JSP page. To do this we run the app which will startup Tomcat, launch the Eclipse browser and then display the JSP. Note, by default Eclipse will use it’s internal browser however you can configure eclipse to use another browser installed on your worklstation. Goto Window > Preferences and then expand General and select Web Browser.
-
- Run the project by clicking the Run icon or from the Run menu select Run.
- Accept to run using the default Tomcat server and your JSP should display in the browser
- Now go back to the JSP editor and add the following directive at the top of the page,
<%@ page import="java.util.*" %>
-
- Next update the code within the body tags to look like the following,
<%
Date d = new Date(session.getLastAccessedTime());
%>

This page was last viewed <%= d.toString() %>
-
- Save the JSP and go back to the eclipse browser tab and click the refresh icon. The JSP should now update with the change.
Web Archive – How to create a war file from Eclipse
When we have finished with a project and want to deploy it elsewhere we create a WAR file. To do this,
- Right click on the project and select Export > WAR file
- Update the name or keep default and enter a Destination for where the WAR file will be created
- Click Finish and your WAR file is generated.
You can now import the War file to your test or production environments. Refer to your application server documentation for instructions on how to deploy a web application from a WAR file.
That gets us started with creating web applications. In the next article we’ll look at how to setup Eclipse to use the BusinessObjects SDK and then create a simple logon page to test that all is set up correctly.

i did all these things and followed part 2 too but getting following error
type Exception report
message
description The server encountered an internal error () that prevented it from fulfilling this request.
exception
org.apache.jasper.JasperException: com/crystaldecisions/enterprise/ocaframework/idl/ImplServ/OSCAFactoryPackage/connection_failure
org.apache.jasper.servlet.JspServletWrapper.handleJspException(JspServletWrapper.java:460)
org.apache.jasper.servlet.JspServletWrapper.service(JspServletWrapper.java:355)
org.apache.jasper.servlet.JspServlet.serviceJspFile(JspServlet.java:321)
org.apache.jasper.servlet.JspServlet.service(JspServlet.java:257)
javax.servlet.http.HttpServlet.service(HttpServlet.java:729)
root cause
javax.servlet.ServletException: com/crystaldecisions/enterprise/ocaframework/idl/ImplServ/OSCAFactoryPackage/connection_failure
org.apache.jasper.runtime.PageContextImpl.doHandlePageException(PageContextImpl.java:841)
org.apache.jasper.runtime.PageContextImpl.handlePageException(PageContextImpl.java:774)
org.apache.jsp.login_jsp._jspService(login_jsp.java:85)
org.apache.jasper.runtime.HttpJspBase.service(HttpJspBase.java:98)
javax.servlet.http.HttpServlet.service(HttpServlet
LikeLike
that seems to be a fairly generic error, do you know at what point in your code is throwing the error?
LikeLike
it was just some jars missing so i included whole library…. thanks for great post
LikeLike
agulland,
I am new to SDK and after successfully pulling report i have requirement to show prompts of that report to user using SDK…. I have downloaded sdkexample and trying to figure out things from it but as i am not programmer i have great deal of problem understanding the way there are 5-6 jsp files and all….. is there any easy to understand document which can help me Thanks in advance
LikeLike
Samples are your best bet although they aren’t easiest for deciphering what’s going on. There’s a few more docs on the SAP website but they aren’t very detailed. If you don’t have experience of java and JSP it will be difficult to begin with. What might help is to start with what you have for viewing a doc and then add code for prompts, testing as you go to see how it fits together.
The tricky thing with prompts is that you need to display a page that allows a user to fill in prompt values and then take those to another page which displays the doc.
Good luck!
AL
LikeLike
And I should’ve said if you’re looking at learning JSP then a good place to start would be my JSP course!
LikeLike
Good one.. i liked the step by step process properly documented..
Thank You Very Much
LikeLike
I followed both tutorials but still I am getting eventhough i installed the jar and placed in value in both classpath and path
org.apache.jasper.JasperException: An exception occurred processing JSP page /login.jsp at line 24
21: IEnterpriseSession eSession = null;
22:
23: try {
24: final ISessionMgr sessionMgr = CrystalEnterprise.getSessionMgr();
25: eSession = sessionMgr.logon(sUsername, sPassword, sServer, “secEnterprise”);
26: sSuccessFailMsg = “You have successfully logged on! BOE version: ” +
27: eSession.getEnterpriseVersion();
Stacktrace:
org.apache.jasper.servlet.JspServletWrapper.handleJspException(JspServletWrapper.java:521)
org.apache.jasper.servlet.JspServletWrapper.service(JspServletWrapper.java:412)
org.apache.jasper.servlet.JspServlet.serviceJspFile(JspServlet.java:313)
org.apache.jasper.servlet.JspServlet.service(JspServlet.java:260)
javax.servlet.http.HttpServlet.service(HttpServlet.java:717)
root cause
javax.servlet.ServletException: java.lang.NoClassDefFoundError: org/aspectj/lang/Signature
org.apache.jasper.runtime.PageContextImpl.doHandlePageException(PageContextImpl.java:865)
org.apache.jasper.runtime.PageContextImpl.handlePageException(PageContextImpl.java:794)
org.apache.jsp.login_jsp._jspService(login_jsp.java:100)
org.apache.jasper.runtime.HttpJspBase.service(HttpJspBase.java:70)
javax.servlet.http.HttpServlet.service(HttpServlet.java:717)
org.apache.jasper.servlet.JspServletWrapper.service(JspServletWrapper.java:388)
org.apache.jasper.servlet.JspServlet.serviceJspFile(JspServlet.java:313)
org.apache.jasper.servlet.JspServlet.service(JspServlet.java:260)
javax.servlet.http.HttpServlet.service(HttpServlet.java:717)
LikeLike
Hi,
The key error is,
java.lang.NoClassDefFoundError: org/aspectj/lang/Signature
and this means that your missing a required JAR library. I don’t recognise aspectj and a quick google looks like that this is part of Eclipse (http://www.eclipse.org/aspectj/) so maybe there’s an issue with your Eclipse install?
Were you able to create a Basic JSP as described above? Or if you’re using a more recent version of SAP BusinessObjects than the version mentioned in the article then there’s maybe additional required JARs
AL
LikeLike